Integrating DialogFlow
This article details how to integrate DialogFlow with Xatkit.
Objectives
- Create a DialogFlow agent for your bot
- Learn how to configure Xatkit to use DialogFlow
This tutorial uses the GreetingsBot example defined in this tutorial. You can find it in your local Xatkit installation at xatkit/examples/GreetingsBot.
Xatkit embeds a default intent recognition provider that translates user inputs into intents using a set of simple regular expressions. While this provider does not require any configuration, it has been originally designed for testing purposes, and is probably not powerful enough for real-world chatbots.
If you completed the previous tutorial, you may have noticed that the bot is not very smart, and does not understand inputs like hi, or simple typos like helo. This is because the default intent recognition provider performs exact (and case sensitive) matches of the inputs against the defined intents.
Xatkit relies on third-party Natural Language Processing (NLP) services to improve the quality of the intent recognition. Specifically, the current version of Xatkit provides full support for Google's DialogFlow, an online NLP engine that relies on machine learning to extract intents from examples provided as training sentences.
Xatkit Tip: other NLP libraries
For now Xatkit supports the default regular expression provider as well as DialogFlow and Nlp.js, a great alternative especially when looking for a local solution. Additional NLP solutions such as Microsoft's Luis and IBM's Watson Assistant are planned in the future.
Go to the DialogFlow website and open the console. If you are new to DialogFlow you will need to create a new account or login with your Google account (DialogFlow may ask for specific permissions during this process).
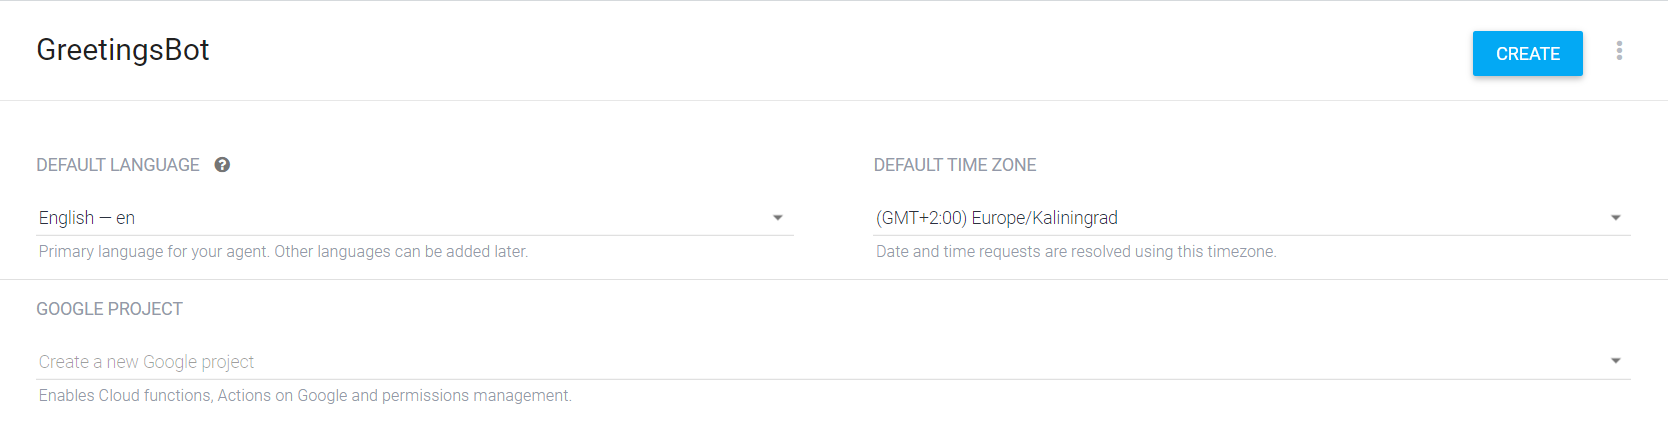
A DialogFlow application is called an agent. It basically contains a set of intents to match and answers to print (advanced features are described in the DialogFlow documentation). Note that you don't have to define any intent manually, this will be automatically handled by Xatkit. Create a new agent from the DialogFlow console, and name it GreetingsBot. Check that the default language is set to English-en and click on Create.
Open the configuration page of your created agent, and note the value of the Project ID field, we will reuse it later to setup Xatkit.
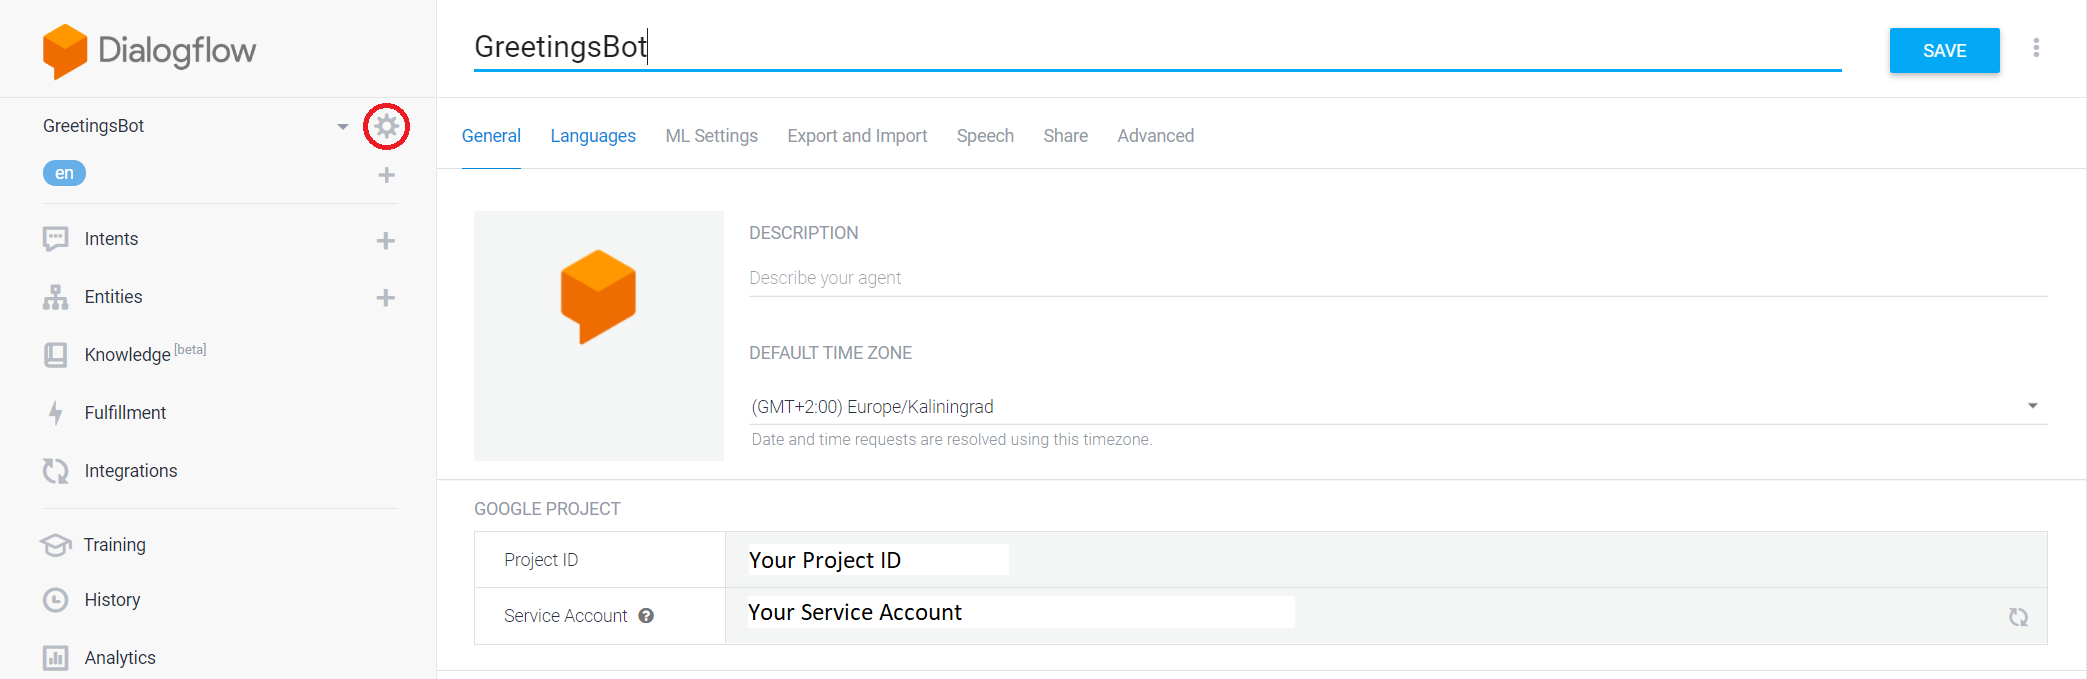
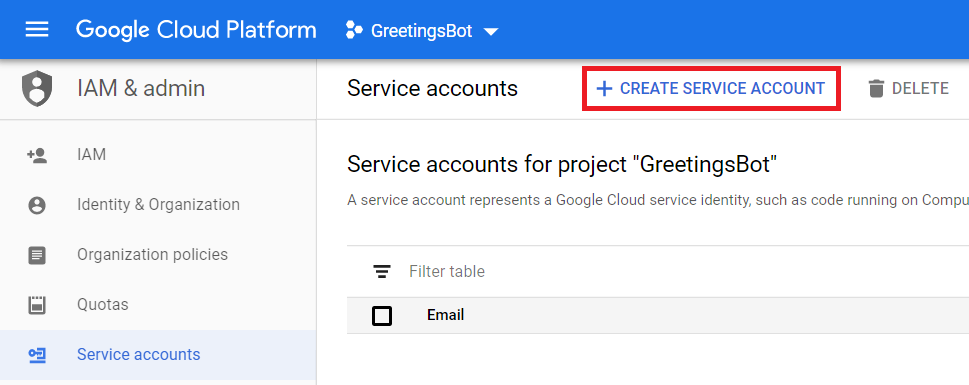
Click on the Service Account field, this will open the Google Cloud Platform administration page related to your agent. Navigate on Service Accounts in the menu, and click on Create a Service Account on top of the page. NOTE: if you don't see the Service Account field try directly clicking on the Project ID and then look for the Service account in the IAM & Admin menu.
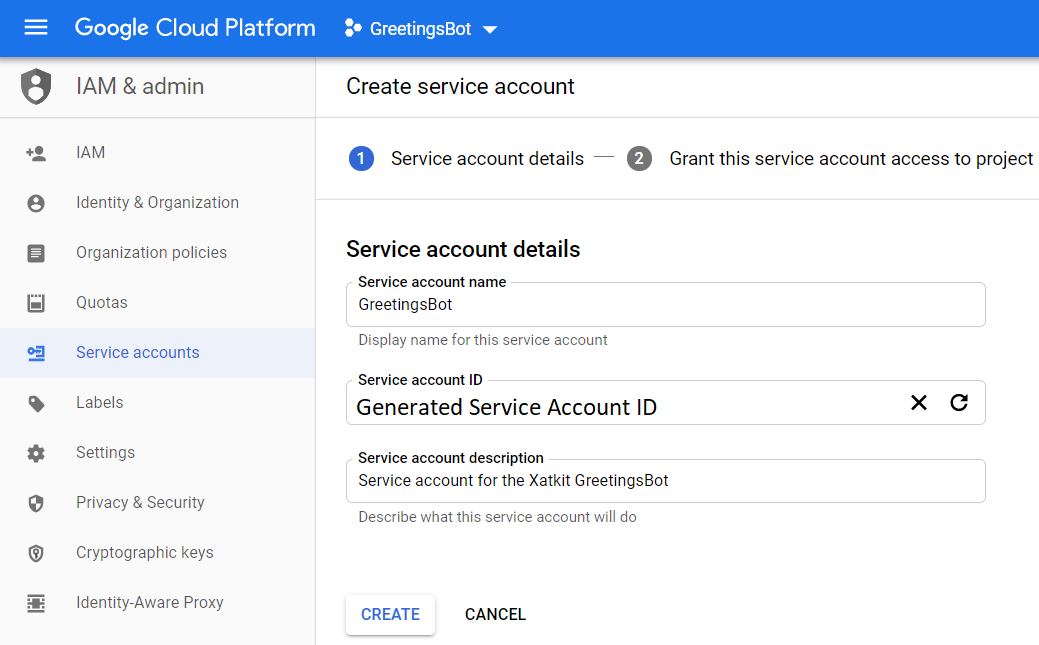
Fill the form with the information provided below. this first form specifies general information on the service account to create. We can simply name it GreetingsBot and provide a simple description of the account.
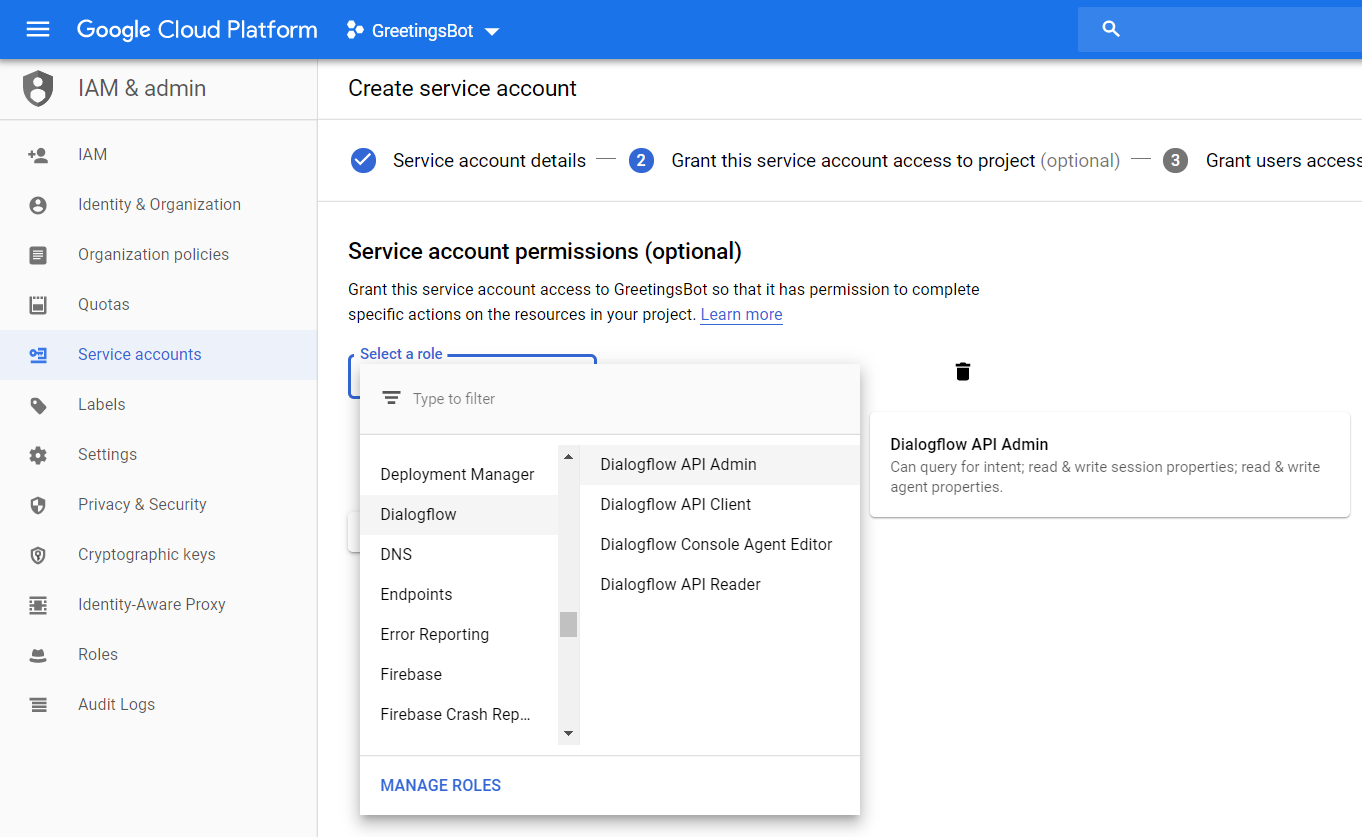
The next step specifies the permissions given to the created account. Xatkit requires DialogFlow administration rights to create and deploy intent to your DialogFlow agent. Select the Dialogflow API Admin role from the dropdown menu and press OK.
The last step creates credential keys that will be used by Xatkit to authenticate and access your created DialogFlow agent. Press the Create a key button at the bottom of the page, select the JSON key type from the right panel, and press Create. Save the generated key, we will reuse it later to configure Xatkit. NOTE: if you don't see the Create a key button on this page, complete the process and you'll be able to create the keys by going to the list of service accounts for the project and clicking on the Actions column for the service account we just created.
Xatkit Tip: securing your DialogFlow key
The downloaded key gives administration access to your DialogFlow project, do not share it or upload it on public repositories.
Your DialogFlow agent is now ready to be used with Xatkit!
Last but not least, we need to configure our Xatkit bot to use the DialogFlow agent we just created. To do so we first need to add a dependency to our pom.xml file:
<dependency>
    <groupId>com.xatkit</groupId>
    <artifactId>xatkit-dialogflow</artifactId>
    <version>0.0.1-SNAPSHOT</version>
</dependency>
Then we need to update the bot's configuration file/object to tell the runtime engine to use the DialogFlow connector. Open GreetingsBot.properties (or directly modify the Configuration object), and add the following properties:
xatkit.intent.provider = com.xatkit.core.recognition.dialogflow.DialogFlowIntentRecognitionProvider
xatkit.dialogflow.projectId	= <Your agent Project ID>
xatkit.dialogflow.credentials.path = <Path to the downloaded JSON credential file>
xatkit.dialogflow.language = en-US
xatkit.dialogflow.clean_on_startup = true
Note that you can use static constants to set these values if you are working with a configuration object (and not a file):
botConfiguration.addProperty(IntentRecognitionProviderFactory.INTENT_PROVIDER_KEY, DialogFlowConfiguration.DIALOGLFOW_INTENT_PROVIDER);
botConfiguration.addProperty(DialogFlowConfiguration.PROJECT_ID_KEY, "<Your agent Project ID>");
botConfiguration.addProperty(DialogFlowConfiguration.GOOGLE_CREDENTIALS_PATH_KEY, "<Path to the downloaded JSON credential file>");
botConfiguration.addProperty(DialogFlowConfiguration.LANGUAGE_CODE_KEY, "en-US");
botConfiguration.addProperty(DialogFlowConfiguration.CLEAN_AGENT_ON_STARTUP_KEY, true);
These properties tell Xatkit to use your DialogFlow agent, and provides the path to the JSON credential file downloaded from your service account. Note that the path of the credential file can be absolute or relative.
Xatkit Tip: clean your agent
The
clean_on_startupproperty tells Xatkit to clear the agent before deploying your intents. This is a development feature that ensures the agent always contains the latest version of your intents. Additional DialogFlow-related properties are available on the Xatkit Options page.
These options allow to customize the underlying DialogFlow intent recognition provider. Note that mandatory options only concern bots using a DialogFlow intent recognition provider.
| Key | Values | Description | Constraint |
|---|---|---|---|
xatkit.dialogflow.projectId |
String | The project ID of the DialogFlow agent used by the bot | Mandatory |
xatkit.dialogflow.credentials.path |
String | The path of the DialogFlow's credential file that grants access to the agent (see here for more information) | Mandatory |
xatkit.dialogflow.language |
String (DialogFlow language code) | The language used by the DialogFlow agent | Optional (default en-US) |
xatkit.dialogflow.clean_on_startup |
Boolean | Deletes all the registered intents and entities when starting the bot. This option allows to easily (re)-deploy bots under development, but also triggers a full re-training of the underlying agent each time the bot is started. | Optional (default false) |
xatkit.dialogflow.intent.loading |
Boolean | Allows to disable intent loading from the DialogFlow agent. This option is used to reduce the number of queries sent to the DialogFlow API when running Jarvis tests. Warning: disabling intent loading can create consistency issues between the DialogFlow agent and the Jarvis runtime and should not be used in production. Note: this option is automatically set to false if xatkit.dialogflow.clean_on_startup is true. |
Optional (default true) |
xatkit.dialogflow.entity.loading |
Boolean | Allows to disable entity loading from the DialogFlow agent. This option is used to reduce the number of queries sent to the DialogFlow API when running Jarvis tests. Warning: disabling entity loading can create consistency issues between the DialogFlow agent and the Xatkit runtime and should be not used in production. Note: this option is automatically set to false if xatkit.dialogflow.clean_on_startup is true. |
Optional (default true) |
xatkit.dialogflow.followup.lifespan |
Integer | Allows to change the default lifespan used for followup intent's out contexts | Optional (default 2) |
xatkit.dialogflow.confidence.threshold |
Float | The confidence threshold used to accept/reject recognized intent based on their confidence score. Note: intent containing any entities cannot be rejected based on the confidence threshold (these intents typically have low confidence scores) |
Optional (default 0: accept all intents) |
We now have configured our GreetingsBot example to use DialogFlow as its intent recognition provider. To test the new version of the bot you can run the bot as usual and navigate to http://localhost:5000/admin to test your deployed chatbot! Note that the deployment of the bot may take a few seconds because it requires to connect to the DialogFlow API and train the underlying machine learning engine (Xatkit will print information on the learning process being performed in the log).
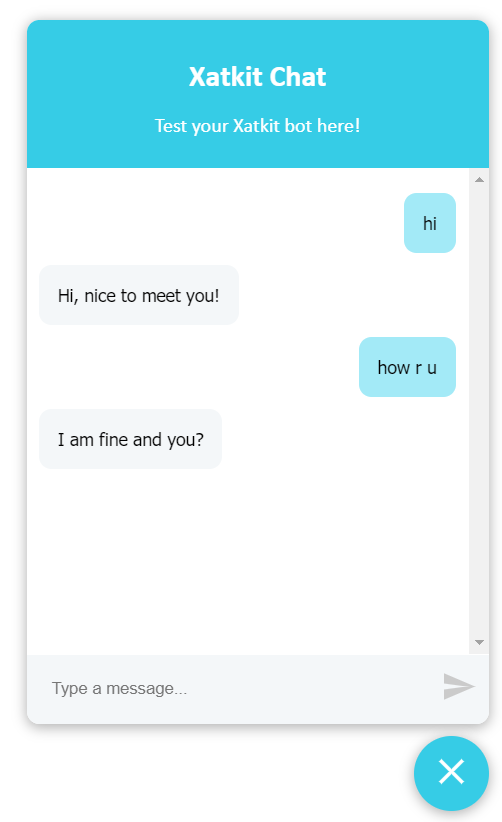
Note how yYour bot is now powered by DialogFlow and can detect intents from user inputs that are not exactly matching the training sentences defined in your bot definition!
- To use DialogFlow with Xatkit you need to create a DialogFlow agent for you bot, and update Xatkit configuration file to tell the runtime component to use your agent to deploy intents.
-
You don't have to update your bot definition: in this article we didn't change the
.javafile, the same definition is used to deploy the bot on DialogFlow instead of the default intent recognition provider. This means that you can easily switch from one provider to another, or benchmark which provider better fits your application!